Sunday, July 13, 2014

Bathroom Update

It's time for me to update our guest bathroom. It is a little juvenile and since the household is all older than 20, the bathroom needs to be hipped up. Here are some before pictures (notice the rubber ducks and frogs):


I wanted to easily update it. This means no painting, no updating of fixtures, and needs to be cheap (Target and Ikea).  I also wanted to make it more efficient. Here is is:


Some efficiency changes I made
I really disliked cleaning the little corner ledges of the bathtub, they were covered with goopiness from the odd shampoos/lotions/etc piled up on them. I also tried shower hangers, but they tilted or fell off. So I bought the soap dispensers and the corner shelf. They attach easily with provided silicone glue. Love them!


And I don't know about you, but keeping towels neatly folded on a towel rod never happened, so I used to put up "fake" neatly folded towels, that were never used. This is a waste of space in a small bathroom.  So I got some S hooks from Ace Hardware and put them on the towel rod. And now it's easy to simply hang up the towels.


Also, my college-grad daughter uses this bathroom when she is here.  The bathroom doesn't have enough counter space for her lotions and potions, so I bought the rolling grey cart from Ikea. We just roll it out before guests arrive, that's her face towel on the hook.


Pin It

Friday, June 6, 2014

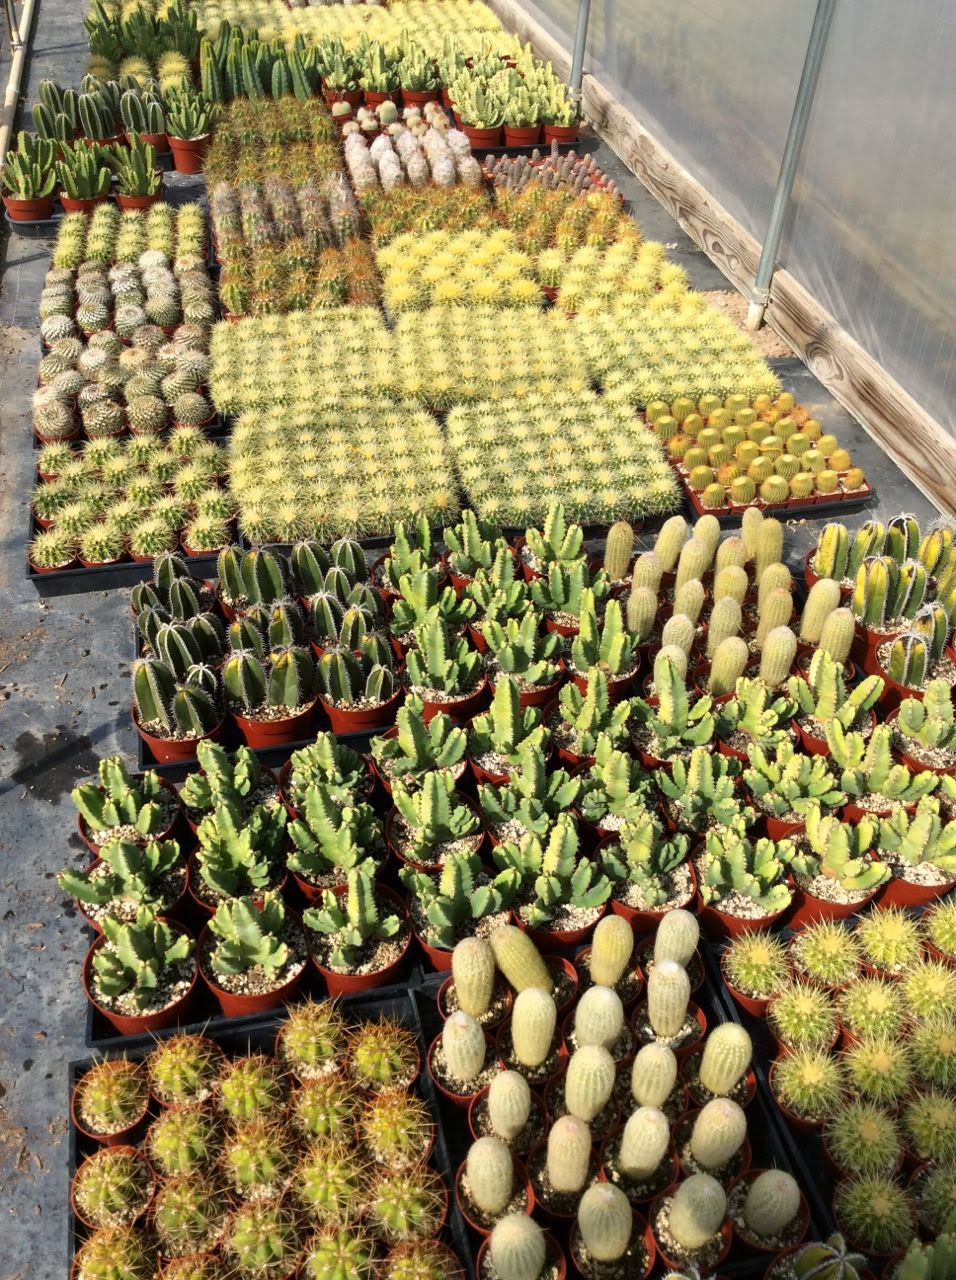
Cactus Quilt

We visited Civano's wholesale nursery and I couldn't resist these cute little cacti.


Pin It

Thursday, June 5, 2014

DIY - Anthropologie Inspired Bracelet

I really like this bracelet from Anthropologie for two reasons: cute and colorful; as well as easy to make! Here is the inspiration.

Here is my version:


Here are the simple steps to make a single wrap bracelet:
1. Gather supplies: 2mm cord (about 20 inches long), fabric glue, a strip of fabric (about 1.5" x 18"), button, embroidery floss, and nylon cord (so it can melt to seal the knots). 
2. Thread the cord through button, half way.
3. Lay the button end of cord on the strip like below. Smear fabric glue on the fabric's wrong side, under the cord. 
4. Fold the fabric over the cord, and press down onto the glue. 
5. Smear more glue onto the wrong side of the fabric and wrap the fabric around the cord. Keep glue and wrapping. Check for the length of your bracelet by wrapping around your wrist.   
6. When you get to the length you want, create a loop that is large enough for the button to go through. 

7. Cut the cord so it will be hidden under the fabric. Add more glue to the fabric and wrap it around the cord once and then trim the fabric, adding more glue to seal it in place.
8. Tie a length of the embroidery floss on one end, then wrap it around until you get to the other end and then knot it.

9. Start at the other end (button side) with another length of floss and then wrap it down to the loop side. And then tie it.

10. To secure the fabric, loops, and floss, use about a 15 inch piece of cord and use a macrame knot about 6 times on each side. Click here for directions. Only you just take the 15 inch piece and tie it on the top and that creates the two outside strings you need to macrame, with the bracelet being the two middle pieces.


 11. Trim the cord to about 1/2 an inch, then melt the ends with a lighter. When the cord forms a little ball close to the bracelet, blow out the flame and then touch the ball to make it into a little button. It will be hot.


12. And that's it!


Pin It

Friday, May 23, 2014

Outdoor Furniture Upcycle

We saw this set of outdoor chairs and a table at a salvage yard.  They had nice retro lines, but were in bad shape. The plastic table round was cracked.
I clipped off all the old vinyl straps and washed them.

I then sprayed painted each one of them. That took forever. We were able to buy a roll of new vinyl. And following the directions from the company, we cut the strips, heated them up in hot water, stretched them, and attached them back to the chair (we did have to buy some new clips), as well as cussed at them.  I covered the cracked table round with tan vinyl (from my fabric stash). But they turned out really nice, and it's a great place to have dinner on these lovely desert evenings.

Pin It

Friday, May 9, 2014

Potted Plants Trick

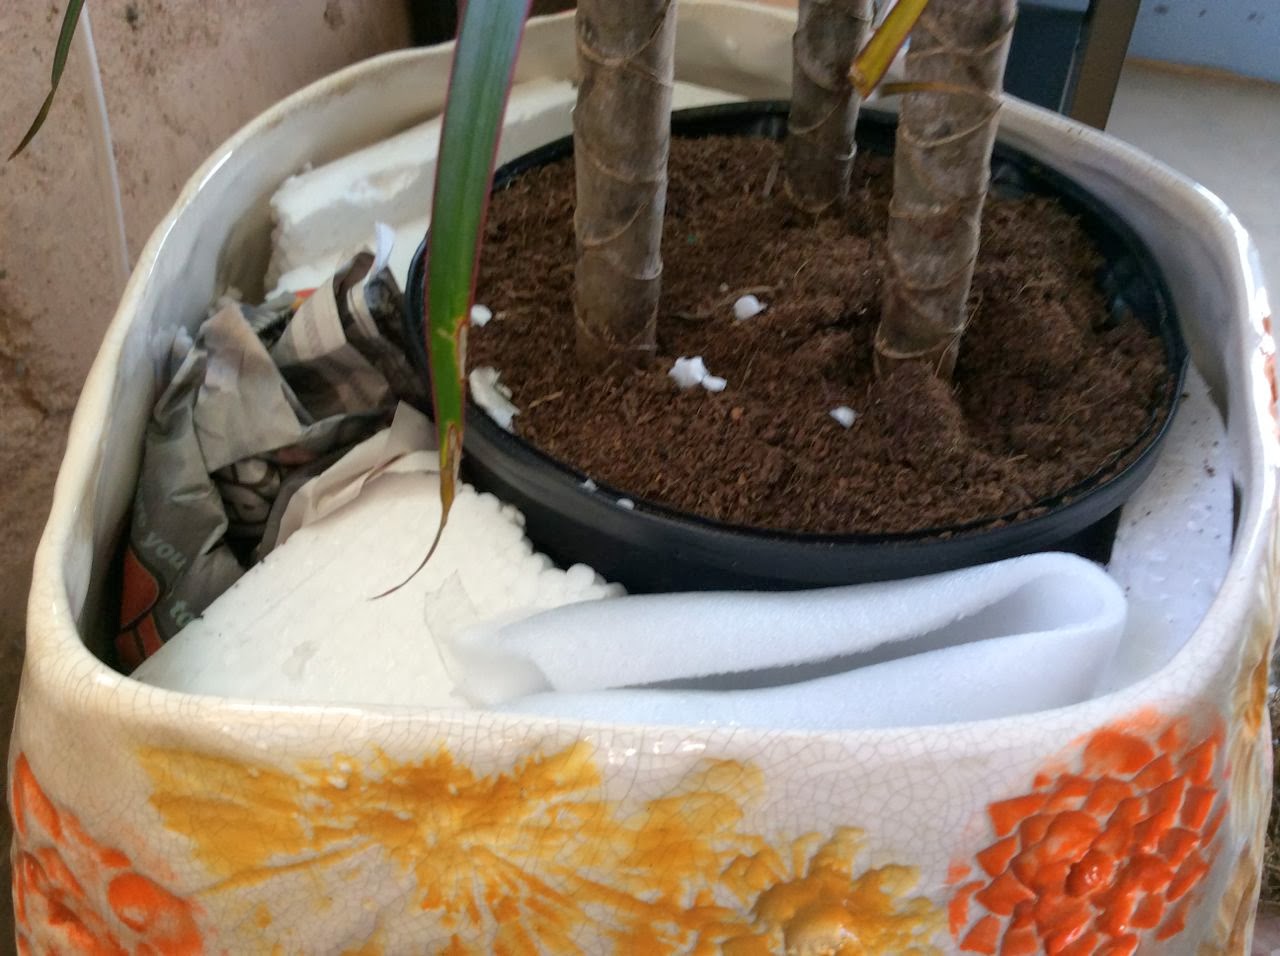
Here is a trick that I learned from a professional indoor gardener. Her job is to maintain the plants inside offices, malls, restaurants, etc.  To use the cool pots that don't have any drainage or if you don't want them to drain onto your floors and if you don't like the look of saucers or plastic trays under your pots, this is what she does:
1 - Gather your supplies: plant, pot, plastic tray, nursery pot, styrofoam/newspaper, and moss.
 2. Put the tray in the bottom of the pot and the nursery pot on top but upside down.  Then put your plant on top of the nursery pot.  If the pot is too tall, you can cut it down, or buy a smaller pot.  You can use any kind of plastic container.  She uses plastic so it doesn't rot.  She has used old tupperware.
 3. Now wedge the foam and newspaper around the plant to stabilize it as well as provide a base for the moss.  This pot was tricky as it is narrower on the top. You are not filling up the whole pot, but just around the top.
4. Now cover the foam/newspaper with the moss. You now have a plant that you can water and not worry about the water damaging your floors.  


Scott and I really liked this pot when we first saw it at Home Goods.  We call it the "grown-up 2nd grade ceramic project."

Pin It

Friday, April 25, 2014

Cord Catchall

Before

I have so many things that need to be plugged in/charged on my desk, that I have a mess of cords, surge protectors, etc.  It's a challenge to keep track of them as well as the issue of some cords can stay permanently here, but others need to easily be removed (for vacations, school, etc). Now as soon as I get a cord, I label it, so that I know what it's for.  But I also created a quick box to hide them all. Not sure if the fire marshal would approve, so please don't come after me if they catch on fire. Here are the steps:

1. Gather your supplies: a box (I used an Ikea box), and an Exacto knife.
2. Cut a hole for the cords to go in/out of.  I used the hole already on the side of the box and just connected it.

3. Make your box, and put the cords inside that you want to hide. I have a surge protector strip inside the box, that's the thick cord coming out of the box, and going down the hole in the top of my desk to the plug below. It's easy to take cords, by just opening the box and unplugging it.


After


Pin It

Friday, April 11, 2014

Envelope Pocket Pillows

Okay, the only purpose for all the pillows on a bed, is to cover up the messy, wrinkled pillows that you actually use at night. But rather than having a bunch of fussy pillows, I wanted some pillows that you could pile up to read at night. These pillows hide the interior pillow within an envelope pocket.  They are easy to make, by following this tutorial. But I didn't have a sheet that I liked, so I made my own "sheet" by adding a yellow pleat to some grey fabric (all the fabric is from my stash, so I'm not sure on the yardage, but just use the tutorial to get the approximate size).

1. Gather your supplies: fabric for your pillows (I think I had about 2-3 yards), and fabric for the contrasting strip, thread, sewing machine, pins/scissors, iron.
2. Cut your length of main pillow fabric (refer to the tutorial). I had one piece about 44 inches wide and 80 inches long. I then cut off a ten inch piece pillow length. So I had two pieces of pillow fabric: one that was about 44 inches wide and 70 inches long and another that was 44 inches wide and 10 inches long. (This will be later cut in half to make two pillows.)
3. Cut the contrasting fabric into 3 inch wide strips (of course you could do narrower if you want a slimmer pleat). Putting right sides together, sew the strips together so you have about a 44 inch long strip. Fold the strip in half length wise, wrong sides together, and press with your iron.

4. With right sides together, sew a strip on one edge of the narrow end of your pillow fabric.
5. Then sew the other pillow fabric piece onto the opposite side of contrasting fabric, right sides together. Press.

6. Now fold the contrasting fabric back together, wrong sides together. Should be using the fold that you ironed in step 3.  And press towards the short ten inch piece of pillow fabric.
7. Now along the ten inch pillow fabric piece, fold it over 1/2 an inch and press.
On my ugly ironing board
8. Fold it over another 1/2 inch and press.  Now fold this in half (wrong sides together), so the double folded edge lines up with the seam of the contrasting fabric, covering the contrasting fabric. Pin into place. This part is going to be hidden so don't worry about it too much.


9. Now on the front, sew a top-stitch to secure all the layers. I sewed two to make it a bit more finished: one along the contrast, and one along the left about 1/4 an inch from the previous stitching.

That's it, now you have a piece with contrasting trim, that you can make the envelope pillows for, just follow the instructions here


Pin It