Saturday, April 11, 2015

Makeup Travel Pouch

I like matching accessories but it's hard to find a complete collection that fits my needs and style, so because of Pinterest, lots of online tutorials, I committed to making my own set.  This is one of my favorites - a travel makeup pouch.


What you need:

  • Two pieces of vinyl/laminated fabric/oil cloth (one clear - I used 8 gauge),  7 1/2" x 15"
  • One piece of fusible interfacing or fleece, 7 1/2" x 15"
  • Two zippers longer than 7 1/2" (I used 9 inch)
  • One piece of outside fabric, 9" x 16 1/2" 
  • Thread
  • Ribbon
  • Zipper foot is extremely helpful

1.  Sew your zippers onto the clear vinyl
Fold over the short ends of the vinyl about 3/8 of an inch. It should stick and hold enough. Now with the zipper face up, center it along this edge of the vinyl. You can't use pins as the holes are visible, so I used clothespins. With the zipper foot, run along the edge of the zipper and the vinyl. Sew both zippers on, with the zippers going the same way.


2.  Attach the clear vinyl to the pattern vinyl
Place the clear vinyl (with attached zippers) onto the other piece of vinyl. Move the zippers into the middle (not like the picture shown). And then baste (I used 3.5) around the whole thing, I used a zipper foot because it's along the zipper on two edges.

Fold in half to find the middle, and the mark. I used a whiteboard marker to it would wipe off. Sew down this middle, not basting. Trim the zipper to match the edges. 
3. Iron on the interface
Center the interface onto the wrong wide of the fabric and iron on.

4. Sew on the ribbon
Flip over the fabric, center the ribbon along the length of the fabric and sew along both edges of the ribbon.


5. Attach the vinyl to the outside fabric
Place the vinyl onto the fabric, fold over fabric twice, pinning as you go. Form 45 degree mitered corners.  Sew all the way around, keep the ribbon straight out, so that it gets sew into the edge as well. And that's it!
 
PS After using this, the ribbon can get a little tedious, so I am going to cut off on side of the ribbon and replace with a button, and sew a loop into the other ribbon, so it just buttons close.
Pin It

Sunday, February 15, 2015

Making My Own Travel Accessories

I like projects and I usually go overboard (Zoe's dorm room). Well we are planning a trip to Madrid to visit Zoe and I wanted to travel in style (use less plastic grocery bags) and more grown-up. Thank goodness for Pinterest! Here is my collection:


Clockwise from the blue mini hidden pocket purse, eye mask, makeup portfolio, passport holder, jewelry roll, padded toiletries portfolio, laundry duffel, hidden pocket infinity scarf, undies pouch, two duffel shoe bags.

Here is Zoe's mini collection:

Gingham laundry bag, two polka dot shoe bags, one undies pouch, and a passport folder. I also made her a jewelry roll. I will go into details on most of these over the next couple of weeks, stay tuned!


Pin It

Sunday, January 25, 2015

Christmas Presents

I decided this year to make as many presents as I could. I have a ton of fabric as well as a lot of jewelry making stuff.  So I saw these cute fabric covered notebooks on Pinterest (of course). So I decided to make them. I used this video as a guide and I made myself a prototype.


I also made these bracelets and necklaces for the nieces. (Nephews got whistles, binoculars, and compasses, not home made).


Pin It

Sunday, July 13, 2014

Bathroom Update

It's time for me to update our guest bathroom. It is a little juvenile and since the household is all older than 20, the bathroom needs to be hipped up. Here are some before pictures (notice the rubber ducks and frogs):


I wanted to easily update it. This means no painting, no updating of fixtures, and needs to be cheap (Target and Ikea).  I also wanted to make it more efficient. Here is is:


Some efficiency changes I made
I really disliked cleaning the little corner ledges of the bathtub, they were covered with goopiness from the odd shampoos/lotions/etc piled up on them. I also tried shower hangers, but they tilted or fell off. So I bought the soap dispensers and the corner shelf. They attach easily with provided silicone glue. Love them!


And I don't know about you, but keeping towels neatly folded on a towel rod never happened, so I used to put up "fake" neatly folded towels, that were never used. This is a waste of space in a small bathroom.  So I got some S hooks from Ace Hardware and put them on the towel rod. And now it's easy to simply hang up the towels.


Also, my college-grad daughter uses this bathroom when she is here.  The bathroom doesn't have enough counter space for her lotions and potions, so I bought the rolling grey cart from Ikea. We just roll it out before guests arrive, that's her face towel on the hook.


Pin It

Friday, June 6, 2014

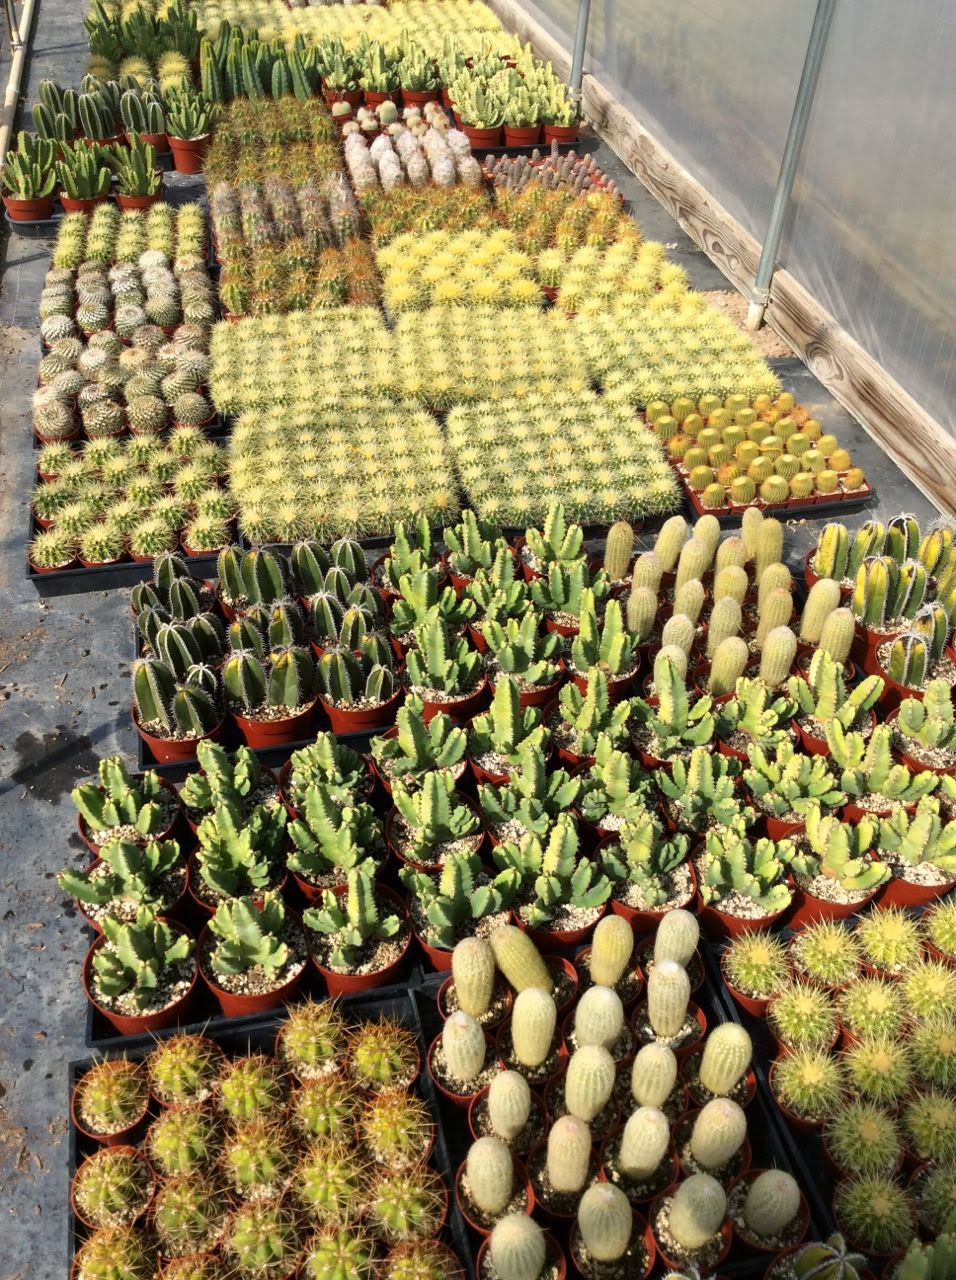
Cactus Quilt

We visited Civano's wholesale nursery and I couldn't resist these cute little cacti.


Pin It

Thursday, June 5, 2014

DIY - Anthropologie Inspired Bracelet

I really like this bracelet from Anthropologie for two reasons: cute and colorful; as well as easy to make! Here is the inspiration.

Here is my version:


Here are the simple steps to make a single wrap bracelet:
1. Gather supplies: 2mm cord (about 20 inches long), fabric glue, a strip of fabric (about 1.5" x 18"), button, embroidery floss, and nylon cord (so it can melt to seal the knots). 
2. Thread the cord through button, half way.
3. Lay the button end of cord on the strip like below. Smear fabric glue on the fabric's wrong side, under the cord. 
4. Fold the fabric over the cord, and press down onto the glue. 
5. Smear more glue onto the wrong side of the fabric and wrap the fabric around the cord. Keep glue and wrapping. Check for the length of your bracelet by wrapping around your wrist.   
6. When you get to the length you want, create a loop that is large enough for the button to go through. 

7. Cut the cord so it will be hidden under the fabric. Add more glue to the fabric and wrap it around the cord once and then trim the fabric, adding more glue to seal it in place.
8. Tie a length of the embroidery floss on one end, then wrap it around until you get to the other end and then knot it.

9. Start at the other end (button side) with another length of floss and then wrap it down to the loop side. And then tie it.

10. To secure the fabric, loops, and floss, use about a 15 inch piece of cord and use a macrame knot about 6 times on each side. Click here for directions. Only you just take the 15 inch piece and tie it on the top and that creates the two outside strings you need to macrame, with the bracelet being the two middle pieces.


 11. Trim the cord to about 1/2 an inch, then melt the ends with a lighter. When the cord forms a little ball close to the bracelet, blow out the flame and then touch the ball to make it into a little button. It will be hot.


12. And that's it!


Pin It